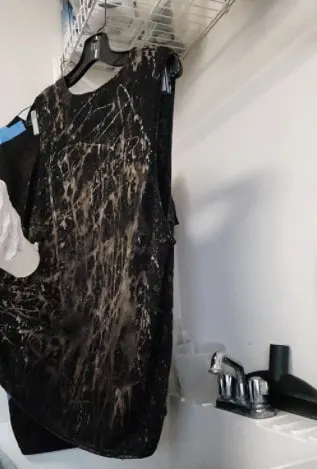
Tie Dye is a viral trend in clothing and accessories and doesn’t seem to be going away any time soon. A new tie-dye fashion trend that I love right now is reverse tie dye.
It’s not often that I find a craft project that the whole family loves. Our tween and teen boys both loved creating their own tie dye tees, and even my husband got in on the action.
In case you’re unfamiliar with reverse tie-dye, you might wonder what it actually means. The reverse tie-dye technique uses bleach instead of dye to create really cool patterns on clothing and other fabric items. Instead of adding color to the garment, you start with a dark or colored piece of clothing and then remove the existing color with bleach.
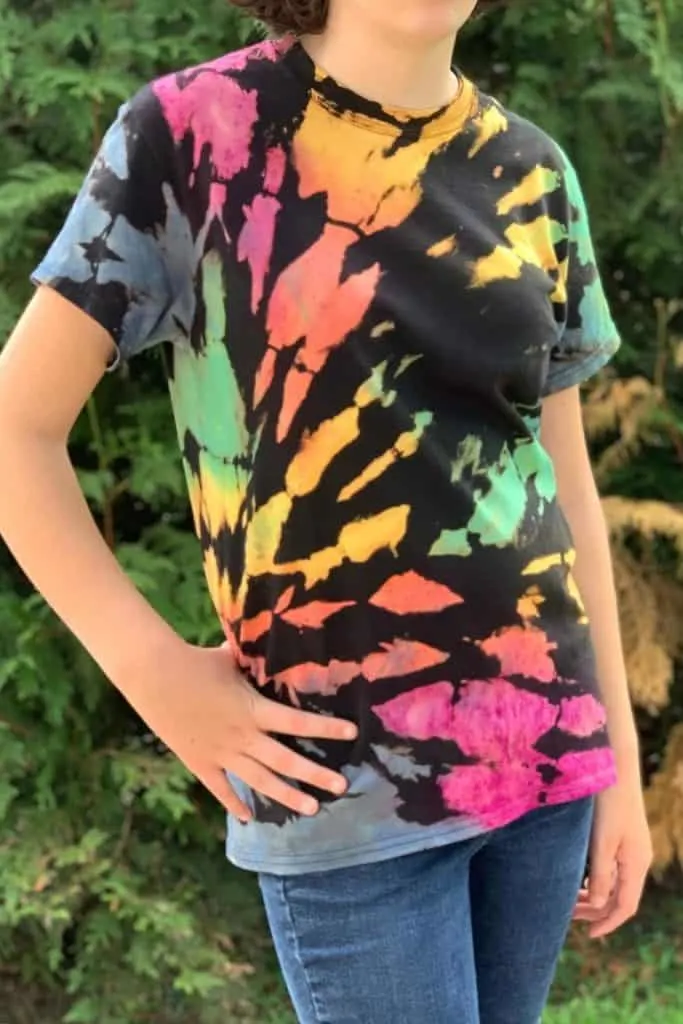
Reverse tie dye creates an amazingly edgy effect! And the coolest effect is when you add color back in afterward.
I’ll show you some examples of these as well in my round-up below.
Supplies Needed For Reverse Tie Dye
It’s best to use a cotton or natural fabric t-shirt. You can use any old color t-shirt or get something similar to the Gildan cotton T-shirt. You can use any color t-shirt you like, not just black.
It’s especially fun to experiment with different color shirts because you never know what the bleached areas will turn out like.
Extra Items Needed:
Tie Dye Techniques
There are so many cool tie-dye techniques to use! Every tie dye technique used with color dye can be used for reverse tie dying with bleach.
The different techniques used will create varying patterns on your clothing. And remember that every tie dye project will look different and be unique.
There are several folding techniques that you can use, as well as ways to apply the bleach.
Different Folding Techniques
- Bullseye fold
- Crumple fold
- Spiral
- Accordion fold
- Flag fold
- Pole wrapped
- Shibori – resist method
Have a look at several different types of folding techniques that you can use in the video below:
Different Bleaching Techniques
- Spray bottle
- Squeeze bottle
- Bucket method
- Bleach pen
- Splatter
Different Tie Dye Patterns
- Ombre
- Sunburst
- Gradation
- Heart
- Stripe
- Splatter
- Spiral
- Rainbow
- Spider
These techniques can be used on many fabric items like T-shirts, Aprons, Dresses, Skirts, Shirts, Sweaters, Hoodies, Bags, Totes, Rompers, Bedding, Curtains, Pillows, Scarf, Socks, Shoes, Beach Towels, Napkins, Bandanas, and even Hammocks.
Fabric Color Changes Using Bleach
Although it depends on the fabric you use, the color of the item, the concentration of the bleach, as well as the length of time you leave the bleach on, in general, you can expect the following color changes:
- Black garments will turn a brown or orange color
- Dark Blue will turn either red or pink
- Light Blue will turn lighter blue or even white.
- Purple will most likely turn pink
- Gray will turn pink, or even white if the grey was light enough
- Brown will turn pink
- Red clothes will turn pink
- Yellow will turn white
- Green can turn a light yellowish-green or white
- Orange will turn a lighter orange or even yellow
- Beige can turn off-white or white
Getting Started – Reverse Tie Dye Instructions
Reverse tie-dyeing is not difficult and the more you practice with different folding and bleaching techniques the easier it will be to get your desired effect.
Get all your supplies together and let’s get started. Just remember that exposure to bleach to your skin and the fumes you breathe in can cause irritation and can be harmful to your lungs.
Safety Tips:
- wear gloves
- wear old clothes
- cover your table with a plastic table cloth
- do the project outside or in a well-ventilated area
Reverse Tie Dye Patterns
You can use any of the folding & dying techniques used in traditional rainbow tie dye looks to create a pattern you like to get the reverse tie dye look.
Most tutorials will show you how to create a reverse tie dye look with bleach on a black clothing item, but you can use any color fabric when using bleach.
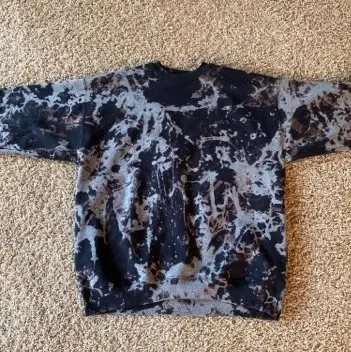
Monochromatic Tie Dye Sweatshirt – Scrunched Pattern
For this tutorial mix your bleach and water in the squirt bottle (3/4 bleach and 1/4 water) and shake gently.
Place your sweatshirt flat on the ground and scrunch it together by pulling the edges towards the center.
Depending on how you scrunch the sweatshirt, will affect the placement of the bleach and, therefore, the outcome of the sweatshirt.
Once you’ve scrunched your sweatshirt, keep it in place by wrapping some rubber bands around it.
Then start squirting the bleach onto both sides of your sweatshirt. Be generous with the liquid and be sure that it’s properly wet.
Here’s a great video showing you how to easily copy this tutorial.
DIY Scrunch Bleach Tie Dye Hoodie
If you’ve been wanting to know how to tie dye a hoodie then this video is super easy. All you need is a black cotton hoodie and some diluted bleach in a spray bottle, then put on your gloves and spray on your scrunched-up hoodie.
Reverse Tie Dye Sweatshirt – Sunburst Twist
In this tutorial, the Pretty Life Girls show us how to transform this gorgeous orangy pink sweatshirt into a reverse tie dye project to die for (yes, that pun was intended 😉).
This is a really super easy DIY project that anyone can try at home with amazing results.
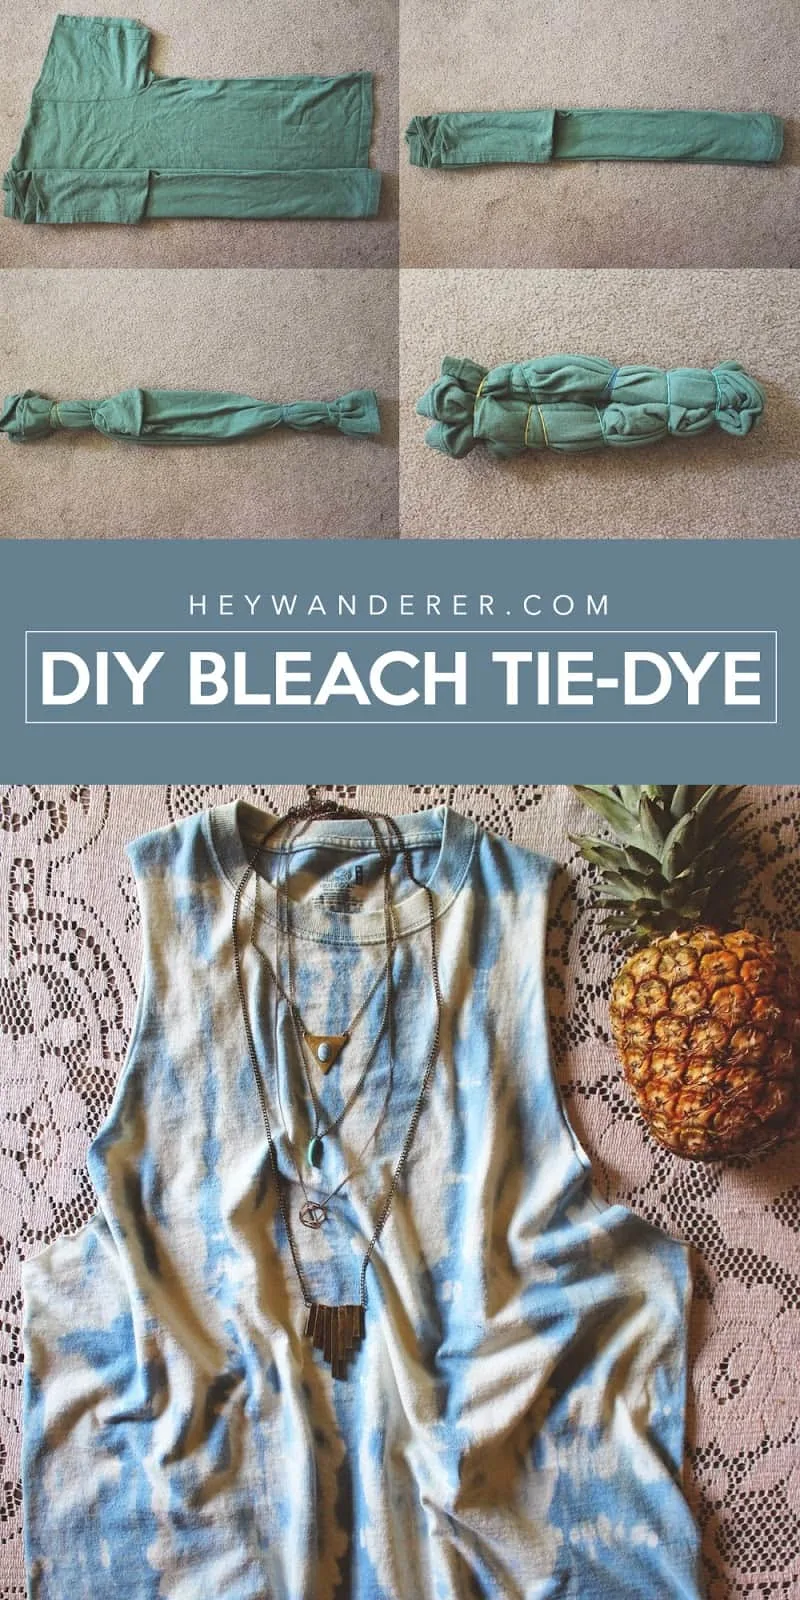
DIY Bleach Tie Dye T-shirt – Accordion Fold
In this tutorial, you’ll learn how to use the accordion folding technique and bleach a wet t-shirt to create a stunning all-over lighter t-shirt.
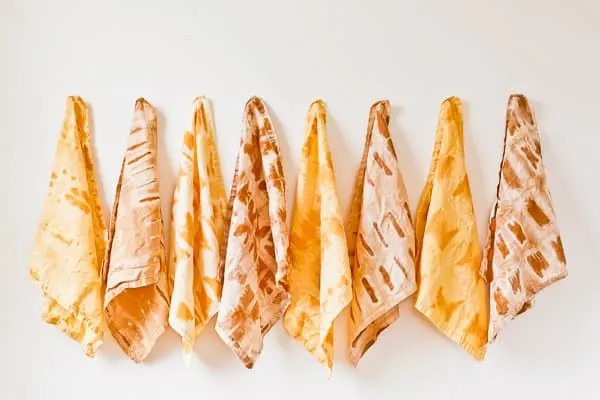
Reverse Tie Dye With Bleach Napkins – Shidori Method
Whether you choose to submerge, spray or pour your bleach on your napkins, this tutorial will show you how to use the shibori method to create awesome tie-dye napkins.
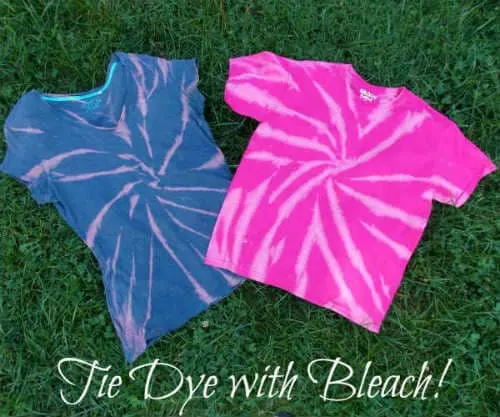
Tie Dye With Bleach – Pink and Blue Tees
Many tutorials will show you how to tie dye a black shirt with bleach, especially if you’re going to redye the shirt again with color later.
This cute tutorial shows you how to create a simple spiral effect on a pink and a blue t-shirt.
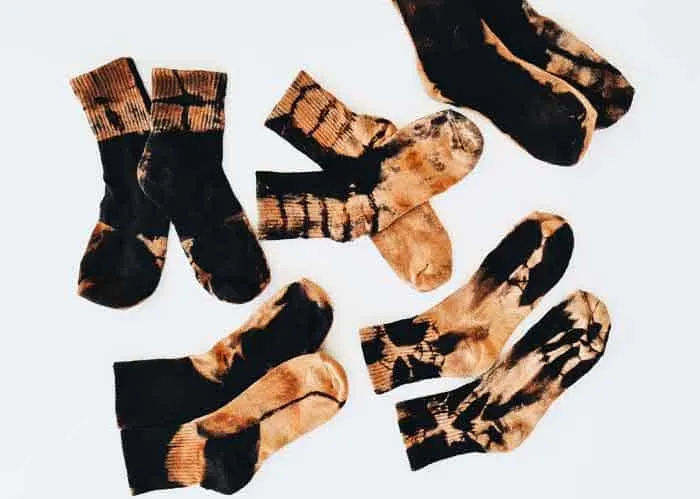
Bleach Tie-Dye Socks – 5 Techniques
This tutorial will show you how to create bleach tie-dye socks using 5 different techniques.
* the side roll method to create lines across the fabric.
* squashing fabric with rubber bands to create a random classic tie dye look
* the triangle fold
* the square fold
* the long roll
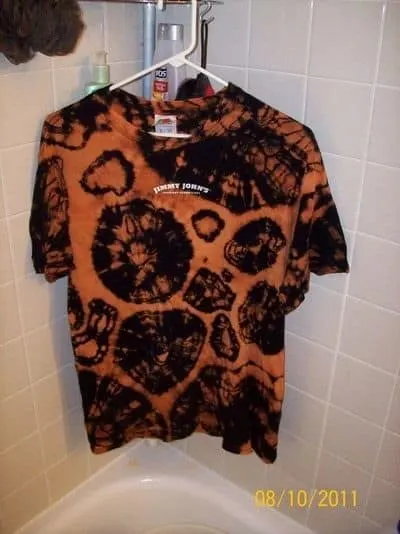
Twisty Circles Reverse Black Tshirt
If you have an old black t-shirt and are unsure what to do with it, why not try recreating this super cool reverse tie-dye DIY.
The circles are created by twisting several areas of the shirt into balls and securing them with strong elastic bands.
Play around with it, and you’ll see that every project is unique.
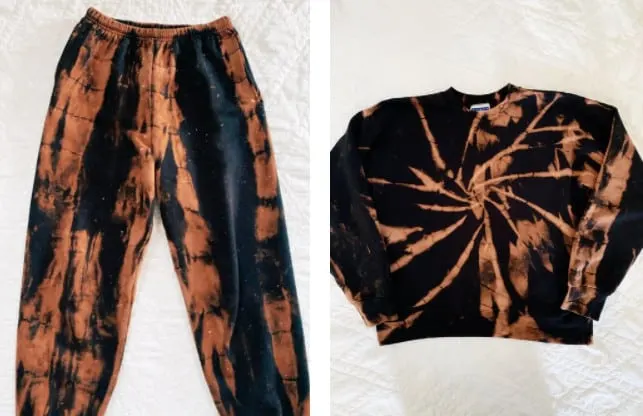
Sweatshirt and Pants Reverse Tie-dye
Have a look at this tutorial to learn how to turn a boring black sweatshirt and sweatpants into a super cool reverse tie dye outfit using bleach.
DIY Tie Dye Jeans
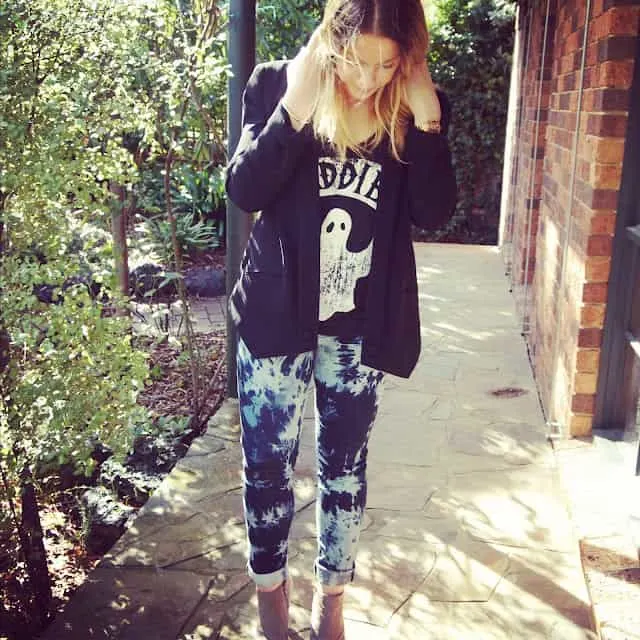
You’ve probably seen some celebrities and models rocking amazing tie dye jeans and you might have wondered where you can buy them. Well, you can make it yourself at home!
Using a simple tie dye crumple fold method you can transform your old jeans into a fashion statement.
Check out these celebs rocking bleached tie dye jeans as well.
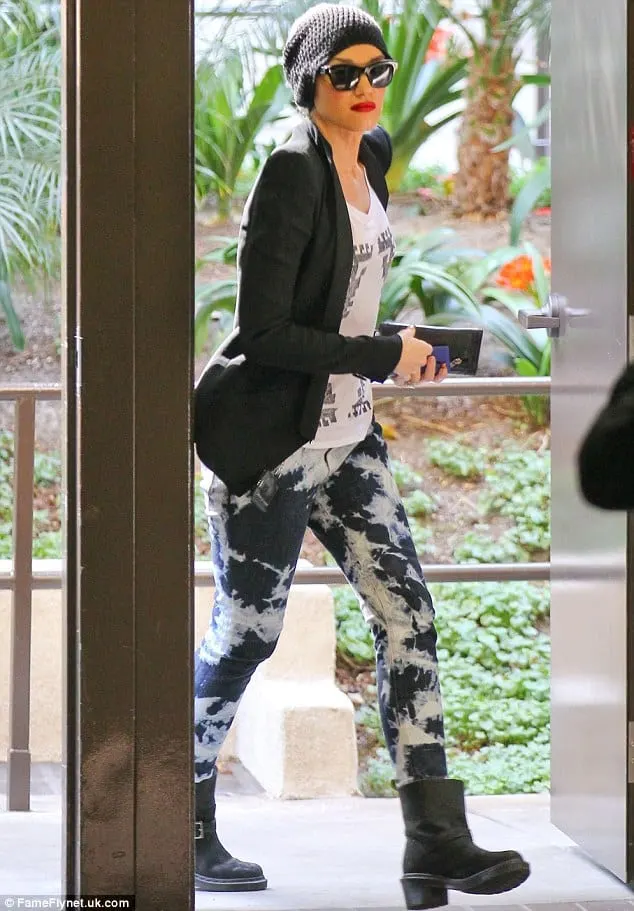
Gwen Stefani wearing reverse tie dye denim – Daily Mail

Fergie looking gorgeous in tie-dye jeans – StyleOpinion
Reverse Tie Dye With Redye
Redyed T-shirt
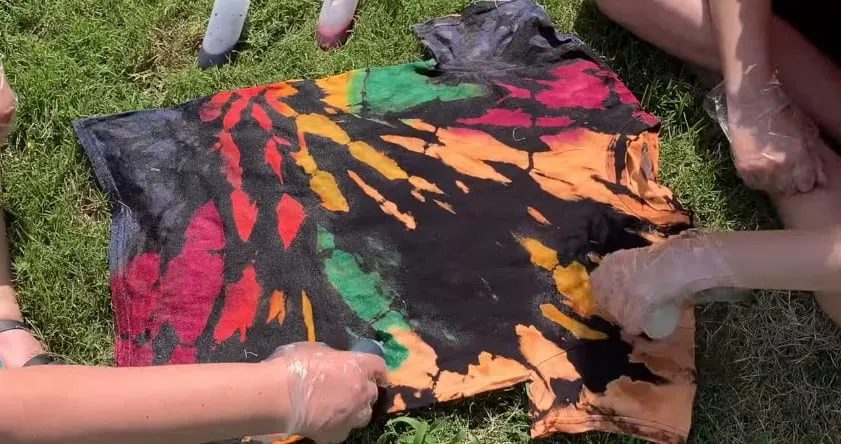
This tutorial will teach you how to do a simple bleach tie dye using Chlorox toilet bowl cleaner instead of pure bleach.
They used the classic bullseye pattern starting on the side of the shirt to first create the simple bleached tie dye look.
Thereafter they added color dye back into the bleached areas to create this amazing reverse tie-dye t-shirt.
This has to be our absolute favorite project as the results are just phenomenal.
You will also need to get a tie-dye kit for this project as you will be adding in color after you’ve bleached your shirt.
Step 1: reverse tie-dye bullseye fold technique
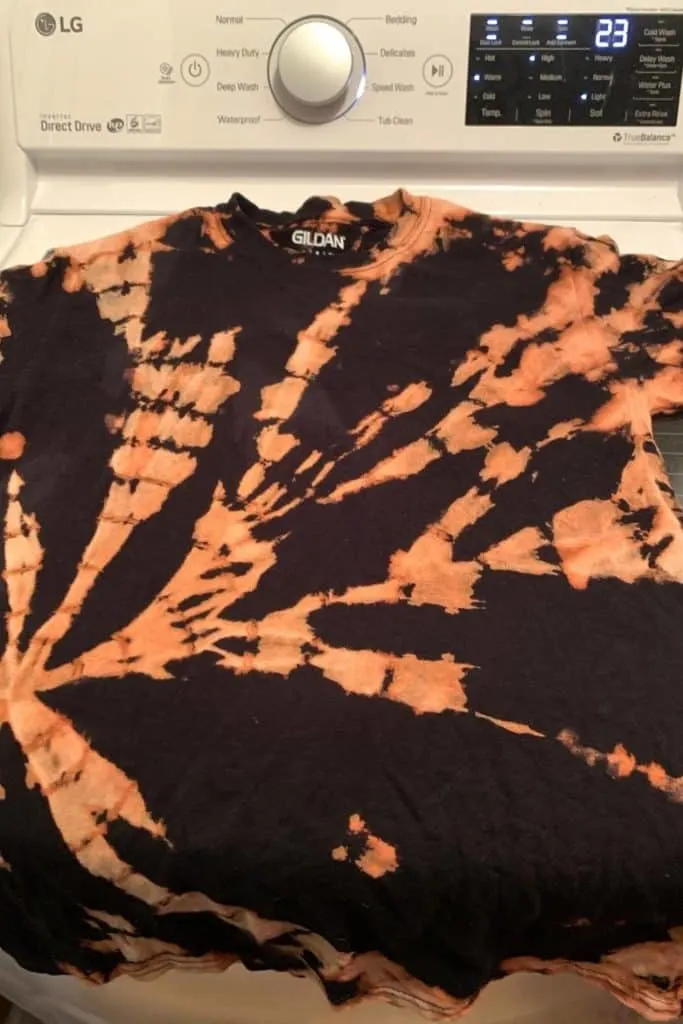
The shirt looks pretty awesome already, but now you get to add color back in.
Although it’s suggested to use bleach on dry fabric, it’s best to use a slightly damp shirt when adding color.
You can redye or add color back into the bleached areas of your shirt either by spiraling the t-shirt again and adding color to different areas of the shirt, or you can lay the shirt out flat and add color to the bleached areas. The second option is the easier of the two and you can get exact colors where you want them.
Here’s the same bleached shirt with color added back on the bleached areas.
This technique is definitely the favorite with everyone in our family.
Abstract Reverse Tie-Dye
I really like this abstract t-shirt. You can replicate this look by tying a few rubber bands along the bottom of the shirt, applying the bleach solution along the bottom, and pouring more up the shirt to create abstract fluid liquid patterns.
You can use any color variations from a tie-dye kit to add color back into the bleached areas.
Reverse Tie Dye Heart T-shirt
You can recreate this romantic heart effect by using the heart tie-dye folding technique and following the tutorial’s reverse tie-dye instructions.
Galaxy Dress Tie Dye
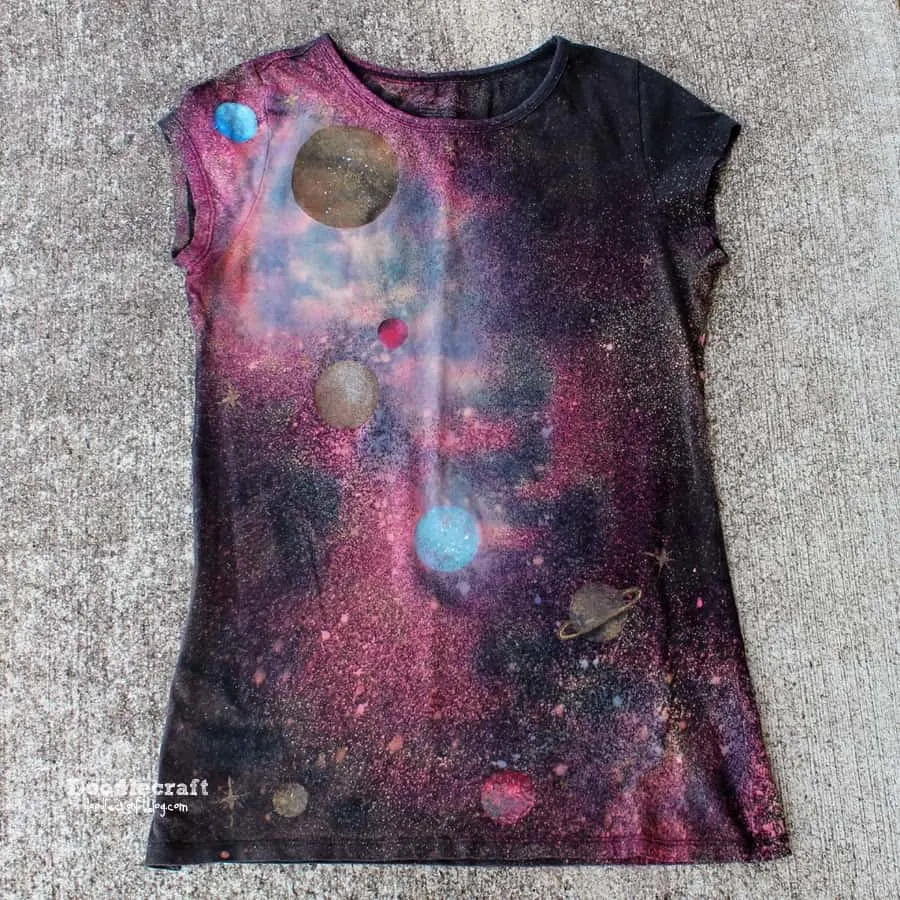
Here’s a totally different bleach technique than your usual tie dye. Instead of tying the material with elastic and adding bleach, she lays the garment down flat and uses a spray pattern to create a galaxy stars effect.
She then redyes the dress with navy blue, fuchsia, and pink to create a gorgeous nebula effect.
She even takes it one step further and paints on planets as well. Such a cool reverse tie dye DIY project.
Galaxy Tie Dye T-shirt
She also made a galaxy t-shirt in the same way as the galaxy dress – super cool.
Vortex Reverse Tie Dye Tee
Watch this amazing video which shows you how to use very precise folding to create the perfect vortex tie dye t-shirt. It’s pretty amazing what you can do with reverse tie dye techniques.
Tie Dye Using a Bleach Pen
Although this is not officially tie-dye, it is a reverse bleach technique that you can use to add lettering and detailed designs to your tees.
She shows you how to make your own bleach pen, but you can also get them from Amazon or your local craft store.
Advanced Bleach Patterns – Spray Technique
It’s amazing how many different ways you can use bleach to create your own custom-designed shirts. You can create images and lettering. Combined with other techniques, the designs are endless.
Bleach Splatter Technique
This very cool tutorial will show you how to use a splatter technique to transform a t-shirt or vest.
Frequently Asked Questions
What Should Not Be Mixed With Bleach?
Sodium hypochlorite is the most common chlorine-based household bleach. You should dilute your bleach with water before applying it to the garments you wish to bleach.
You should never mix liquid bleach with any other cleaning products.
In particular, mixing liquid bleach with other cleaning products, such as acids or ammonia, will produce chlorine gas, a poison gas used in World War I.” Wikipedia
How Do You Reverse Tie Dye?
You can reverse tie dye a colored shirt using bleach. Wherever the bleach is added to your colored shirt, it will bleach or remove the color of the shirt. However, it won’t immediately turn white. For example, if you’re using a black shirt, it will turn from black to brown or orange.
You can use any color shirt if you want to do the simple reverse tie dye with bleach. However, if you want to add color afterward, then it’s best to use black fabric.
When you add back the color dye, it won’t show on black fabric. If you applied this technique on any other color, the dye would show in those areas and might look strange.
What Is The Ratio Of Bleach to Water For Reverse Tie Dye?
You can use different strengths of bleach and water. The ratio you choose will depend on the fabric you’re using and the effect that you’d like to achieve.
The thicker the material, the stronger the solution that you’re using should be, or the longer you will need to let the bleach sit on the fabric.
Most tutorials recommend that you should dilute it either 1 part bleach to 2 parts water, or half and half.
How Do You Apply Bleach For Reverse Tie Dye?
The following are a few ways to apply bleach.
The bucket method: The bucket method involves filling a plastic bucket with 1 part bleach to 1 part water. Submerge the tied-up sweatshirt in the bucket. The shirt should be left in the bleach for about 10 minutes until you can see a color change.
Spray or Squeeze Bottle Method: Put a mixture of bleach and water in a spray or squeeze bottle. The exposed fabric should be sprayed with the bleach solution. If you want the color change to be more intense, you can spray again after about 10 minutes.
There are other reverse tie dye bleaching methods as well, like using a bleach pen or splashing bleach on a garment without tying it.
How Long Do You Let Bleach Tie Dye Sit Before Rinsing?
The longer you leave it, the more effect it will have. Also, the stronger the solution you use, the faster the reaction will be.
If after 5 minutes the color of the t-shirt hasn’t lightened significantly, then you can always spray some more bleach on it again.
You can leave the bleach on the fabric for about 15-30 minutes and then you can check a small area to see if you’re happy with the result.
You should keep in mind that the color will continue to change until the fabric has been washed.
How Do You Rinse and Wash When Your Finished Bleaching?
When you’re happy with the bleaching effect, you can rinse the shirt underwater for a few minutes to rinse out the bleach. Remember to carry them in a bucket or container so that they don’t drip bleach on your floor or carpets on your way to the bathroom/kitchen to rinse them.
Once rinsed put your shirt in the washer and run it through a cold water cycle with normal laundry detergent to remove the rest of the bleach.
If you’re doing more than one reverse tie dye project at once, then you can wash all your items together, but don’t add any other (non-bleached) clothing to this load.
How Do You Neutralize Bleach Tie Dye?
Although you can soak your bleached garment in hydrogen peroxide (mix 1 part hydrogen peroxide to 10 parts water) to neutralize the bleach, it’s probably okay to thoroughly rinse in cold water and then wash on a cold cycle in your washing machine with detergent.
What If I Spill Bleach On My Skin?
Although bleach won’t immediately be dangerous when getting on your skin, it’s still best to rinse it off with cold water. Just run your skin under cold running water to dilute and wash away the bleach.
How Do I Wash Tie-Dye For The First Time?
If probably best to wash your dyed garments separately the first time, just in case there’s any dye left that could transfer to lighting clothing in your washing machine.
If you’re at all worried you can use a color catcher or dye trapping sheet in your wash.
Is It Better To Bleach Tie Dye Wet or Dry?
It is best to reverse or bleach tie dye on dry garments, and to use color dye on wet garments.
I hope you’ve enjoyed learning about all the different reverse tie dye techniques using bleach, and patterns you can make at home. Have fun and play around with your favorite DIY projects.
35 DIY Shoe Decorating Ideas
If you don’t have time to DIY reverse tie dye, then you can always find some amazing inverse tie dye items at shops like Revolve online.


